Packing Your Perfect Day Bag for a Full Day of Skiing

Most skiers think a bigger bag is a better bag, but that's a mistake that leads to sore backs and wasted energy. A heavy pack ruins your center of gravity, especially when you're navigating technical terrain in the Rockies. This guide breaks down exactly what you need to pack for a full day of skiing—from gear to nutrition—so you stay warm, fueled, and light on your feet.
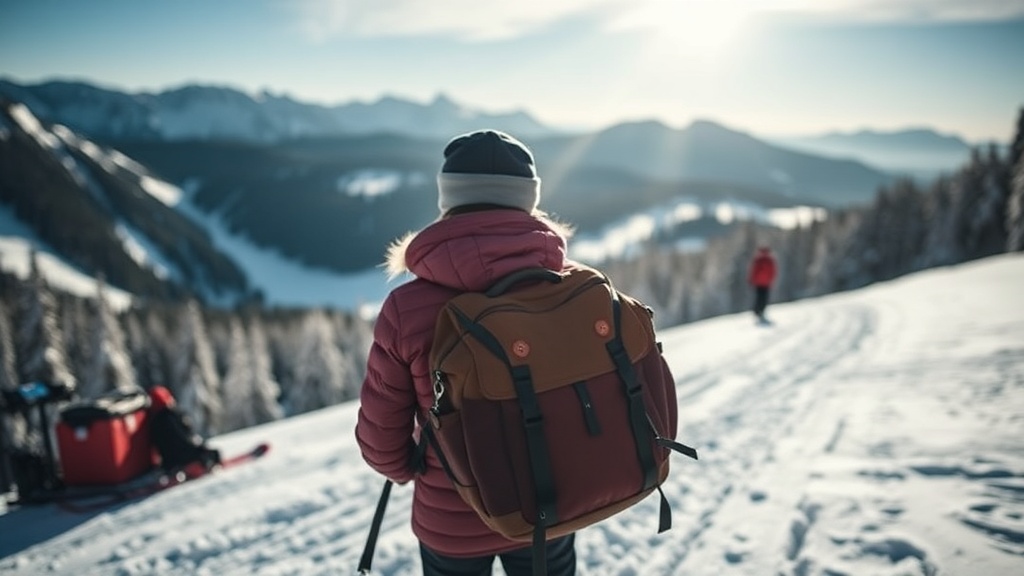
What is the Best Day Pack for Skiing?
The best day pack for skiing is a lightweight, 15 to 25-liter technical pack with a streamlined profile and an avalanche safety compartment. You want something that sits high on your back so it doesn't bounce while you're carving. Brands like Patagonia or Osprey make excellent options that won't throw off your balance. If you're heading into more backcountry-adjacent terrain near Canmore or Banff, look for a pack with a dedicated tool pocket for your shovel and probe.
Don't just grab a hiking backpack from your closet. A hiking pack is often too wide and will hit your helmet every time you lean forward. A dedicated ski pack is much narrower. This keeps the weight close to your spine. It's a small difference, but you'll feel it by the third run.
Check for these features:
- Helmet attachment: A way to clip your lid to the outside when you're in the lodge.
- Hydration sleeve: Even in sub-zero Alberta temperatures, you need to stay hydrated.
- External carry points: Useful if you need to strap an extra layer to the outside.
How Much Should You Pack for a Full Day?
You should pack only the essentials to keep your weight under 5-7 pounds (excluding heavy electronics). A heavy bag is a distraction you don't need when you're trying to focus on your line. Weight management is a science—especially when you're climbing or traversing.
Here is a breakdown of a standard "Day Bag" loadout:
| Category | Essential Items | Why It Matters |
|---|---|---|
| Layers | Mid-layer (Down or Fleece) | Prevents freezing during breaks. |
| Nutrition | High-protein bars/nuts | Maintains energy levels. |
| Protection | Sunscreen & Lip Balm | High altitude UV is brutal. |
| Tech | Power Bank & Cable | Cold kills phone batteries. |
I've seen people show up to the lift with a massive bag full of "just in case" items. That's a mistake. If you aren't sure you need it, leave it in the car. A lighter bag means more agility. It also means less fatigue when you're hitting the final runs of the day.
The Layering System
In Alberta, the weather changes in a heartbeat. You might start the morning in a heavy jacket and end the afternoon in a light shell. Always pack a lightweight down jacket, like the Arc'teryx or Patagonia mid-layers, to throw on during lunch. It's much easier to put a warm layer over your shell than to try and fix a complex layering system while your fingers are numb.
It's also smart to carry a spare pair of gloves. There is nothing worse than a wet glove or a torn seam halfway through a mountain day. A dry pair of gloves is the difference between a great afternoon and a miserable one.
How Do You Keep Food and Drinks Warm?
Keep your food and liquids in an insulated container or tucked deep inside your clothing layers to prevent freezing. If you use a water bladder, the tube will freeze the second you stop moving. I've been there—nothing ruins a vibe like a frozen straw. Use a hard bottle instead, or a specialized insulated sleeve.
When it comes to food, think high-calorie and easy to eat. You don't want to be fumbling with a complicated meal while wearing gloves. Nuts, dried fruit, or even a simple protein bar are perfect. If you're planning a longer session, maybe a sandwich is okay, but keep it simple.
One thing worth noting: avoid too much caffeine in the afternoon. It might seem like a good idea to grab a massive coffee to push through the final hours, but the crash can be brutal. If you need a pick-me-up, grab something light. If you find yourself craving a proper meal later, you might want to look into cozy fireside dining spots once you're off the slopes.
- Store electronics near your body: Keep your phone in an inner pocket. The heat from your body keeps the battery from dying in the cold.
- Use insulated pouches: If you're carrying snacks, an insulated bag keeps them from getting rock hard.
- Pre-plan your breaks: Don't wait until you're starving to eat. Eat small amounts throughout the day to maintain steady energy.
What Are the Most Important Safety Items?
The most important safety items are a fully charged phone, a physical map or GPS device, and a basic first aid kit. While most people rely on their smartphone for everything, technology fails in the mountains. Cold temperatures can drain a battery in minutes. If you rely on your phone for navigation, carry a portable power bank (like an Anker) in an internal pocket.
Don't forget the basics. A small kit with bandages, antiseptic, and some ibuprofen can save a day. It's not about being a medic; it's about being prepared for a minor scrape or a headache.
If you are venturing even slightly away from the groomed runs, your safety needs change. You should be aware of avalanche safety protocols and carry the appropriate gear. A day pack for a groomed run is very different from a pack for a side-country tour. Never carry a pack that is too heavy for the terrain you're actually skiing. It's a matter of safety, not just comfort.
After a long day of carrying your gear and navigating the slopes, you'll likely want to relax. Many people head straight to the car, but there's a lot of value in staying local for a bit. Whether you're looking for a quick snack or a full meal, check out the best places for après ski drinks to decompress before the drive home.
Steps
- 1
Layer Your Essentials
- 2
Organize Your Tech and Snacks
- 3
Secure Your Small Items